
Our recent posts about the quest for Cotopaxi and Nate Denofre’s wilderness adventures got us to thinking: We’ve just about reached hiking season. It kind of snuck up on us this year, because we got so settled into our stay-at-home habits that trailgoing thoughts rarely entered our mind.
Those thoughts are now active, and the weather’s conducive. So we shook the dust out of our backpack, sprayed down our boots, and checked in with some amputee hikers to put together a little refresher about the dos/don’ts and ins/outs of walking on the wild side on your prosthetic leg(s). We picked up some fresh tips we’d never heard before and retrieved some old lessons that it never hurts to re-emphasize. So here we go, step by step.
Why should amputees hike?
We began with Bjoern Eser, a left above-knee amputee (LAKA) who’s hiked all over the world and shares his experiences at The Active Amputee. He got down to first principles recently by asking: What’s so great about hiking? The short version of his answer (read the whole thing) is that it’s the easiest way for amputees to get active—and more important, to feel active. Anybody can participate. You don’t need lessons, nor much specialized equipment; you can hike whether you get around on a prosthesis, crutches, or a wheelchair. You don’t have to be particularly athletic to enjoy yourself, and if you plan your hike well it won’t leave you completely wiped out. It’s also a surprisingly good whole-body workout, as well as a confidence builder. Lots more to learn from Eser about hiking over at his website.
Before you get out there
Next we touched base with Adam Galicki, an LAKA from Florida who wrote an article for Amplitude a few years back about his 500-mile hike along the Camino Frances in Spain. Galicki sent us a fantastic list of Hiking 101 tips and tricks. Here we call attention to his pre-hike checklist, enumerating the steps you should take days or weeks before you take your first step at the trailhead. And just to be clear: He follows these procedures whether the hike he’s prepping for is 5 miles or 500. First, Galicki advises: “Check with your doctor AND prosthetist to make a plan, and to make sure the hardware you are wearing and your health are ready for a hike.” We heard the same recommendation from several other sources, who pointed out that not all prostheses are equally suited for unpaved surfaces and uneven ground. Everything’s going to feel different on a muddy trail than it does on your living-room carpet or redwood deck, so you need to plan accordingly. Your practitioner’s an essential partner in that.

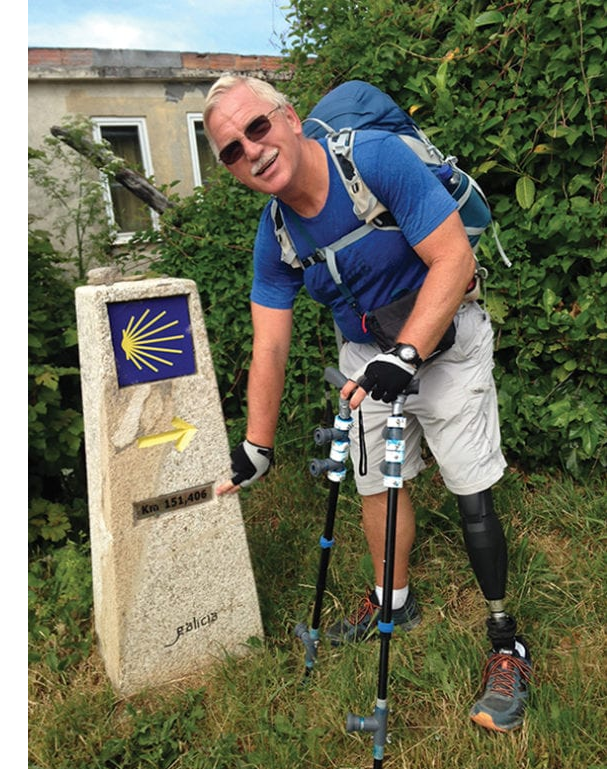
Image courtesy Adam Galicki.
Galicki also strongly suggests easing into the hiking season, beginning with half-mile walks close to home and building up to longer distances. Do it even if you’re already fit and well conditioned. These short outings aren’t for the benefit of your heart, lungs and muscles; the main point is to toughen up your residual limb and reduce its proneness to swelling, chafes, cracks, rashes, and other insults. Those aggravations come with the territory, but they’re less likely to become debilitating if you build up slowly. And you’d rather not have them flare up halfway through a 6-mile hike. Short preliminary jaunts also give you a chance to check out your prosthesis, break in your footwear, and fine-tune other gear before you put them to a difficult test.
A few other planning tips from Galicki:
* Walk with a companion
* Stick to trails rated “easy” or “moderate”
* Start the hike at a slow pace, speed up as you go
* Fully charged cellphone is a must
* Notify spouse, family, or friends where you’re going and when you expect to get back
Shoes, socks and poles
Like many amputee hikers, Galicki favors relatively lightweight footwear—either comfortable trail shoes or regular running shoes. But Glenn Barfield at Amputee Outdoors (RBKA) leans toward what we used to call “clodhoppers,” i.e. big ol’ ankle-high lace-ups. They’re heavy and clunky, but they do support your ankle—and when you’re hiking on only one of those, Barfield points out, the last thing you can afford to do is twist it. And that’s more likely to happen when you’re tired, walking on sloping terrain, and carrying a pack. Opinions differ: Angelina Boulicault of Adaptive Amputees (RBKA) appears to favor high-toppers for mountaintop and canyon-bottom adventures, but you’ll see her in mellower shoes on lighter-duty hikes. Bjoern Eser wore sturdy but low-cut trail shoes on his strenuous climb up Shivapuri Peak in the Himalayas, and so did Chris Olivier of the Amped Life (LAKA) on his round-trip to Corona Arch on the Utah slickrock. Galicki points out that heavy ankle-high boots are pretty useless for above-knee amputees, which tracks with the responses above: Barfield and Boulicault are both BKAs. The best we can say here is to use whatever feels right to you, and what seems appropriate for the terrain. Galicki’s earlier advice bears repeating here: Get your prosthetist’s input on shoes before you hit the trail.
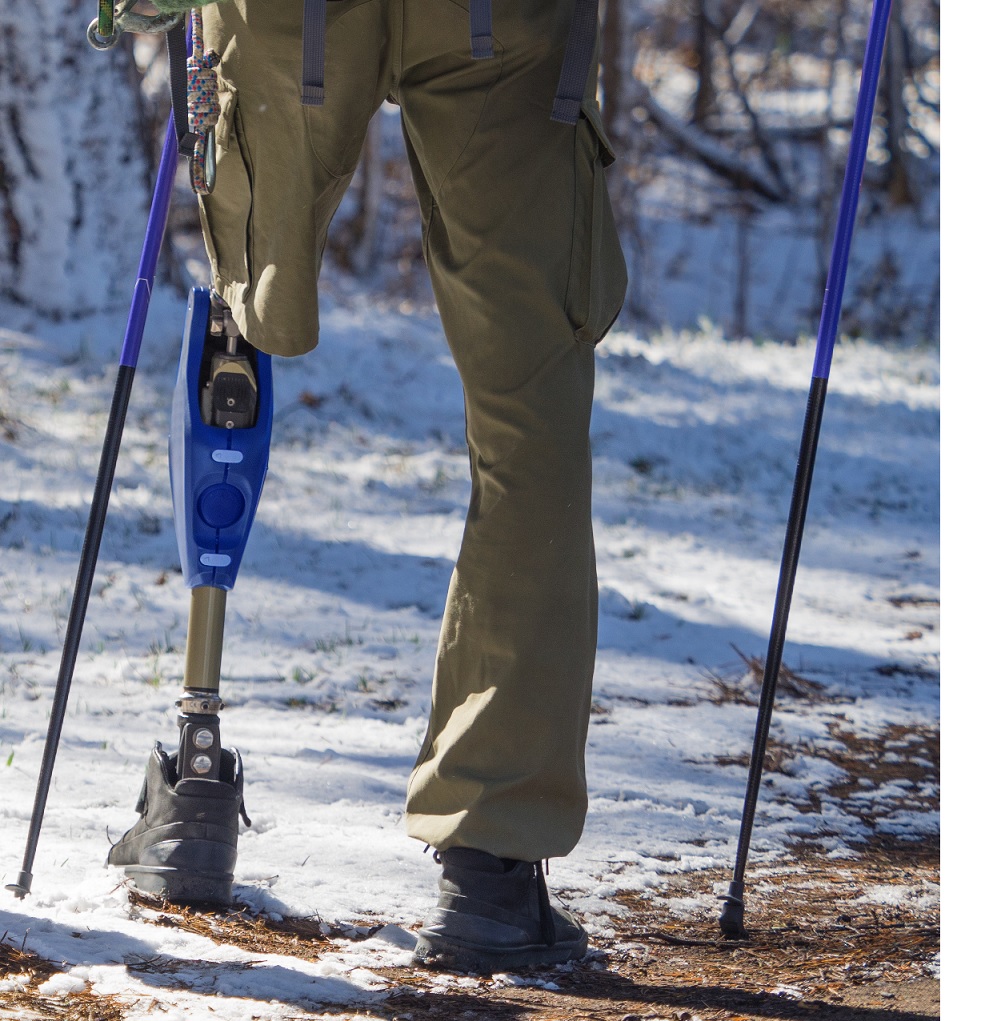
We did find consensus when it comes to hiking poles. Use them. These are trending way, way up among all hikers, amputees and otherwise. They’re good for balance, they shift the burden off your knee(s) and your residual limb(s), and they’re a godsend on the descent from a peak, when you’re tired and the impact on your lower body is greatest. Get retractable poles that you can tuck into your backpack or lash to the frame. If you need a pair, GearJunkie has a good overview of the market.
Socks and socket liners? Double (or triple) up, with a thin layer next to your skin and thicker layers over the thin ones. Carry at least one extra set of dry socks/liners in case the starter set gets drenched in a downpour or just becomes uncomfortably sweaty. Adam Galicki swears by Wrightsocks.
Barfield from Outdoor Amputee suggests tossing a pack of disinfecting wipes into your pack, so you can wipe down your limb and liners as needed during water stops and lunch breaks. He also uses socket sleeves from Fred’s Legs to keep his socket free of dirt, leaves, pine needles, and other debris. Or, if you’re handy with a sewing kit, you can modify your pants to create a good seal around the socket. Fast-forward to about the 12:00 mark in this video for a quick demo.
Other assorted hiking hacks
In no particular order:
- Olivier (Amped Life) always leaves a pair of crutches in his car as a hedge against catastrophic prosthesis failure. In such an unlikely but highly unfortunate event, he’d be able to send a fellow hiker back to his car to retrieve the crutches, enabling him to walk out under his own power.
- Looking for other amputees to hike with? Check out Move United’s list of adaptive hiking clubs and sports centers around the country.
- Boulicault (Adaptive Amputee) has started using microspikes for better traction on snowy or icy terrain. We’ve never used them, but they appear to be easy on/easy off, so you can slip them on trailside as needed to improve your footing. Greenbelly has a good introduction to this gear.
- Another tip from Olivier: Three days before a big hike, he eschews his prosthesis entirely for 48 hours to rest his residual limb. Then he wears his leg the day immediately before the hike to manage swelling.
- On challenging hikes, Eser (Active Amputee) always carries a complete change of dry clothes, a waterproof jacket, a blanket, and a fire starter just in case he should ever get caught out overnight because of weather, fatigue, or plain old bad luck.